I ruined countless weeknight dinners before finally figuring out how to cook a decent baked chicken breast. My meat always turned out completely dry, tasting more like cardboard than a satisfying, protein-packed meal. No matter how much oil or seasoning I rubbed on top, the texture remained horribly chewy. It took months of frustrating, rubbery leftovers to realize my entire approach to temperature control was wrong.
In this guide, you will learn the exact timing adjustments, temperature settings, and prep steps needed to achieve a perfectly tender result every single time.
Now, after changing my methods, I finally look forward to eating healthy chicken every single week. These four strict kitchen rules completely transformed my meal prep routine from boring to incredibly flavorful and juicy. You do not need professional culinary school skills to stop serving chalky dinners to your family. These hard-earned lessons will save your grocery budget and fix your cooking mistakes on the very first try.
The Chemistry of Chicken and Minutes
Cooking lean poultry is always a strict battle against the kitchen clock every single evening. Most home cooks fail because they treat white meat like a slow-cooking beef roast during dinner preparation. A lean baked chicken breast requires immediate high heat exposure rather than a long, drawn-out baking process. Understanding how protein fibers react to heat will save your meat from turning into dry cardboard. Every extra minute inside a hot oven actively forces precious moisture out of the delicate meat cells. You must learn to respect the exact cooking duration to achieve a truly juicy dinner experience.
When muscle fibers heat up past a certain point, they shrink rapidly and squeeze out water. This chemical reaction happens within a matter of sixty seconds if you leave the pan unattended. That is why timing is the absolute king when dealing with skinless and boneless chicken pieces. You cannot simply guess the time if you want a reliable and delicious family dinner tonight. This guide will give you the exact structural schedule to master this simple dish easily.
Secret 1 :The Room Temperature Rest Time
Placing cold meat straight from the refrigerator into a hot oven is a recipe for disaster. This massive temperature shock causes the outer layer to overcook before the center even begins to warm. Your baked chicken breast will always turn out rubbery if you do not fix this common mistake. I always leave my raw poultry on the kitchen counter for fifteen minutes before applying any seasonings. This simple waiting window ensures even heat distribution and keeps the internal meat texture incredibly soft.
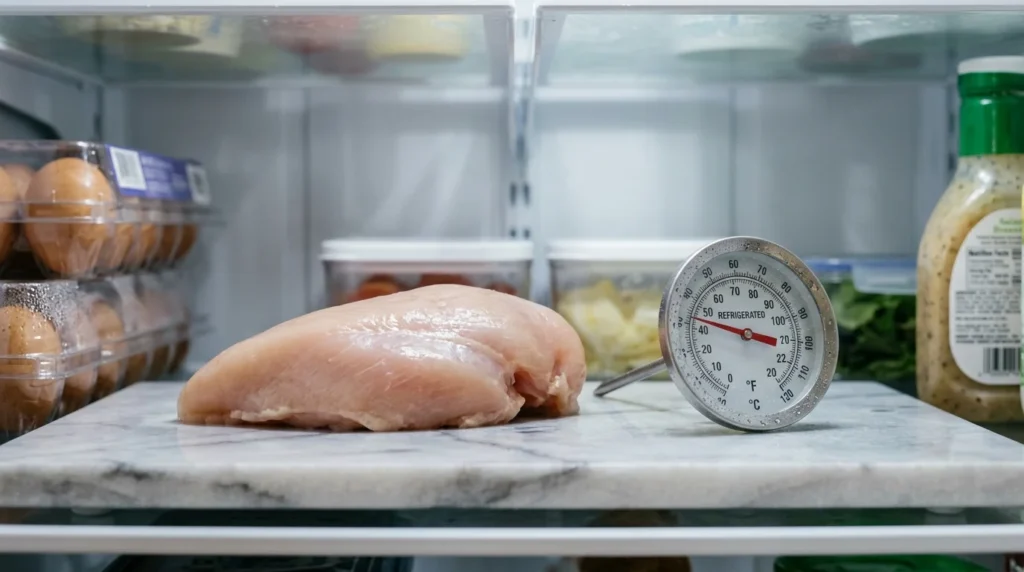
Cold meat contracts violently when hit by extreme oven heat, forcing all the natural juices out immediately. Allowing the protein to relax at room temperature creates a smooth thermal transition during the baking cycle. This hidden step is what separates professional restaurant chefs from amateur home cooks in the kitchen. Your spices will also stick much better to the meat when it is not freezing cold. Make this simple habit your first mandatory rule before you even turn on your kitchen stove.
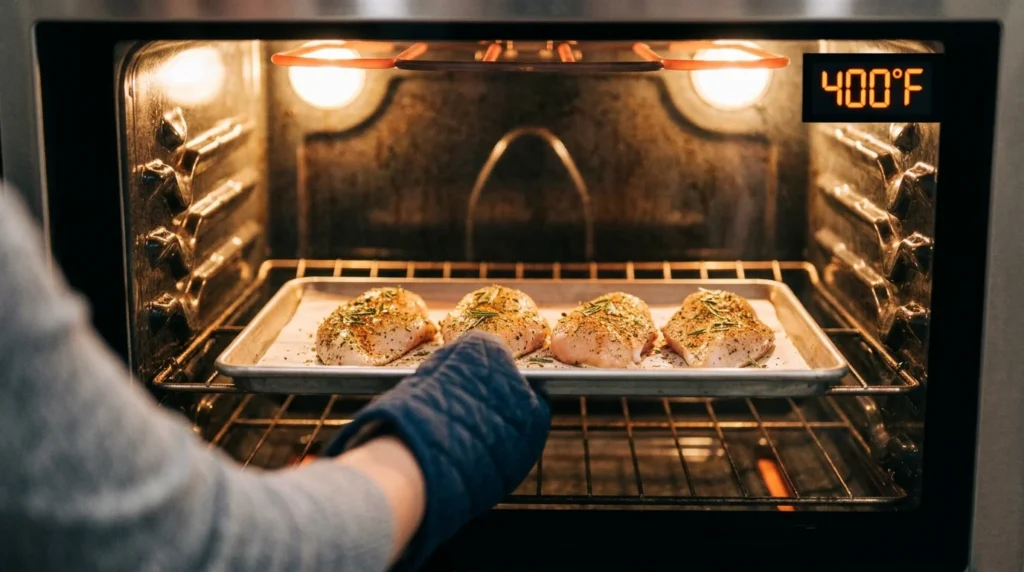
Secret 2 : High Heat, Short Window Strategy
Baking your poultry at a low temperature for an hour completely ruins the natural moisture levels. Long exposure to mild heat slowly evaporates the juices, leaving you with a very chalky texture. You need a fast cooking environment to seal the exterior while keeping the inside beautifully soft.
The 400°F Sweet Spot
A high temperature creates a beautiful crust while locking all the rich flavors inside the meat surface. You should look for a short baking window to keep the center perfectly moist and tender. Most modern ovens work best when set to a steady four hundred degrees for this specific recipe. This thermal level cooks the meat swiftly without singing the edges or drying out the inner core.
The Danger of 350°F
Lower settings require double the cooking time, which actively dries out your delicate daily family dinner. Leave the low temperatures for tough cuts of meat that actually require hours of slow braising. A skinless baked chicken breast has zero protective fat layers to shield it from prolonged dry air. Stick to higher heat settings for the most reliable results every time you prepare this meal.
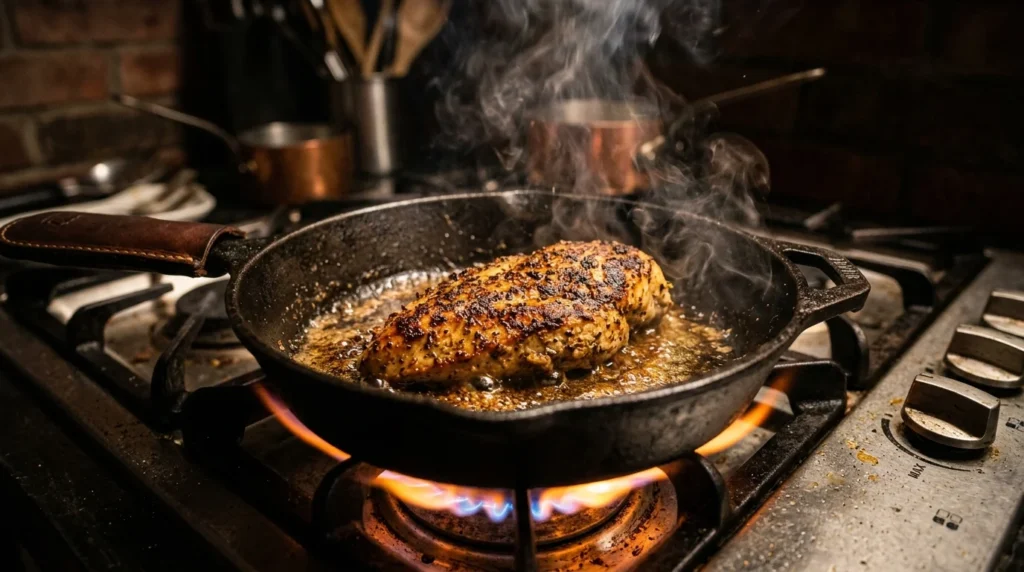
Secret 3 :The Searing Countdown Before Baking
Searing the meat in a smoking hot pan for two minutes adds incredible depth to your dish. This rapid pre-baking step creates an immediate barrier that seals the natural juices inside the white meat. Your final baked chicken breast will benefit greatly from this quick, hard-earned restaurant technique. Do not skip this pan step if you want to avoid serving boring, pale meat to your guests. Just two minutes on each side will completely transform your weekly healthy meal prep routine for good.
The beautiful golden color achieved from searing is actually a chemical process called the Maillard reaction. This reaction locks in flavor compounds that a standard home oven simply cannot replicate on its own. Use a heavy cast iron skillet with a tablespoon of high-smoke-point oil for the best results. Keep your eyes on the clock because a single extra minute can burn the outer spice rub. This fast browning step builds a wonderful foundation before the main baking process even begins.
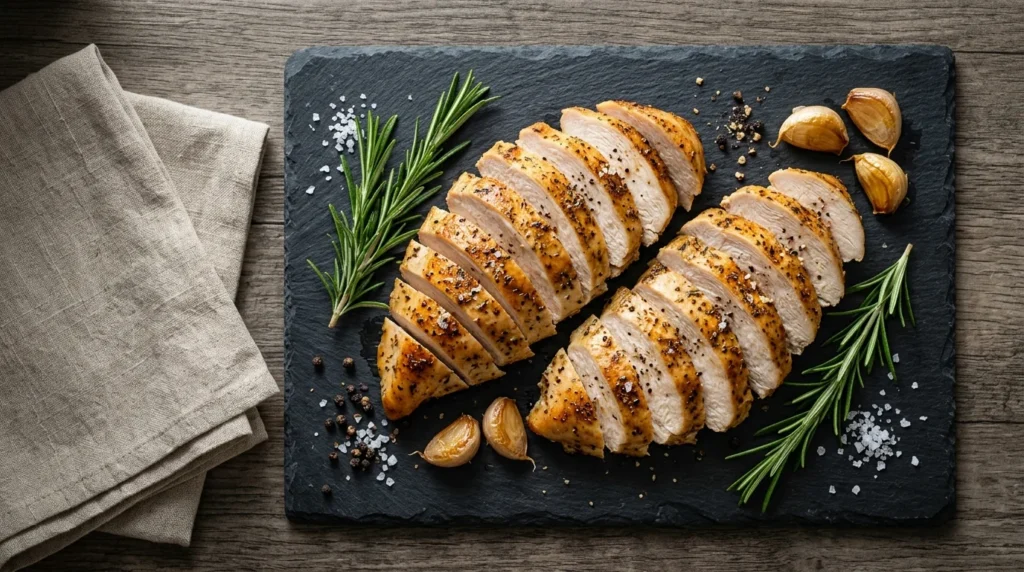
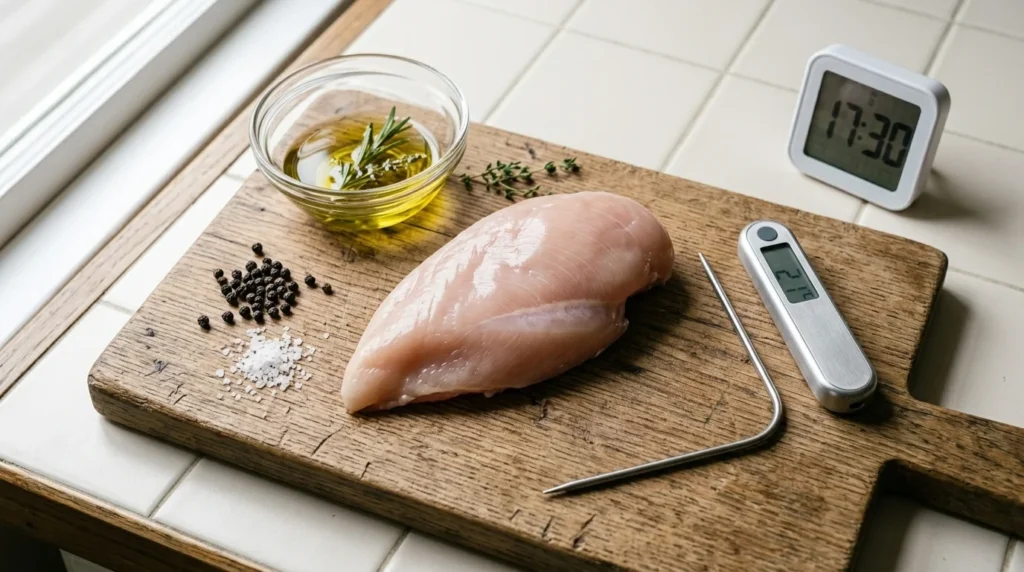
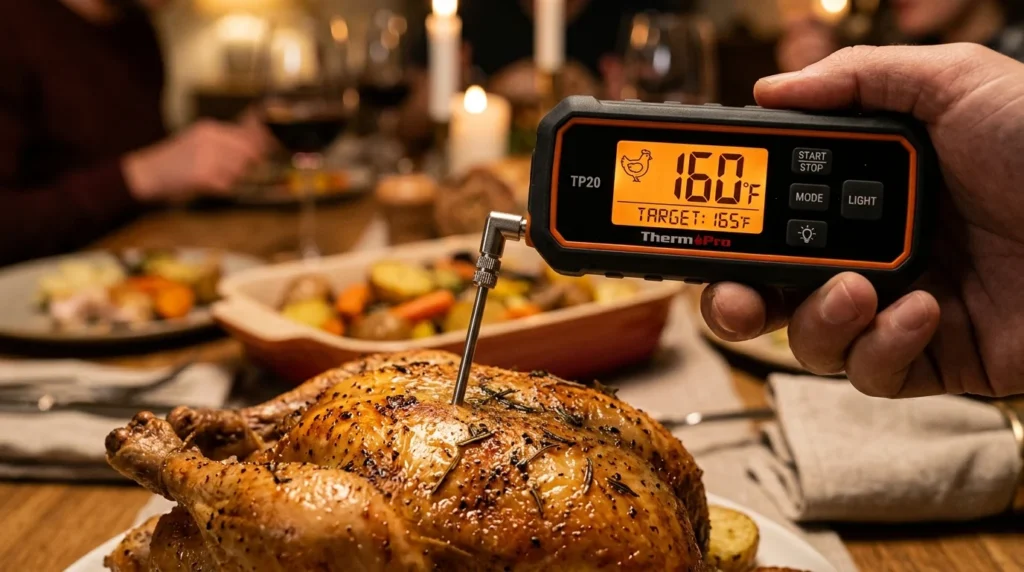
Secret 4 : The Critical Internal Temperature Target
You can never accurately guess the doneness of poultry simply by poking it with a plastic fork. Relying on visual checks usually leads to massive overcooking and a very dry, disappointing family meal. Investing in a cheap digital meat thermometer is the single best decision for your home kitchen. Remove your baked chicken breast from the oven heat the exact moment it hits 160 degrees.
Cooking charts often recommend higher numbers, but they do not account for late residual heat carryover. The internal temperature will naturally continue to rise a few degrees after you pull it out. If you leave it in until it reads 165 degrees, it will eventually hit 170. That small five-degree difference is exactly what turns a tender piece of meat into chalky leather. Keep the thermometer probe inserted into the thickest part of the meat for an accurate reading.
Secret 5 : The Post-Bake Resting Lockdown
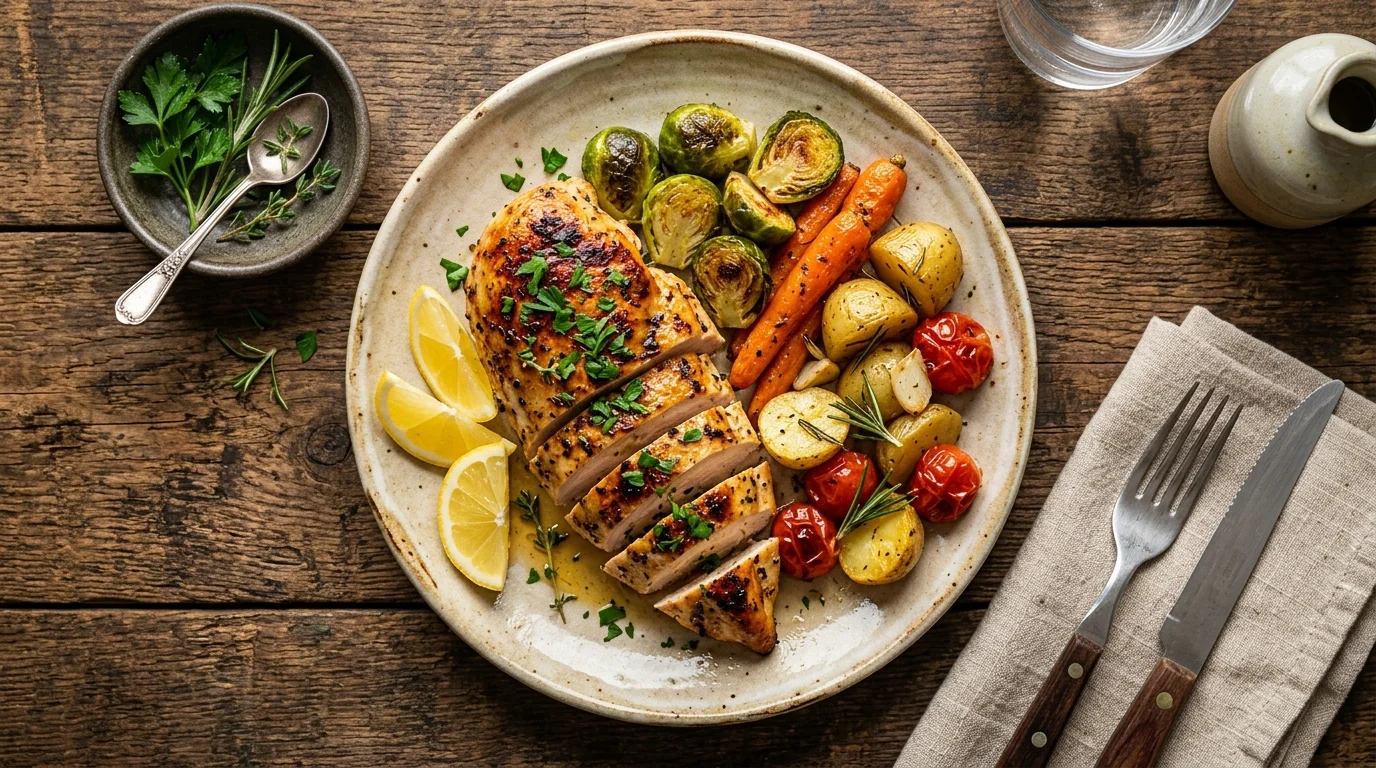
Cutting into your meat immediately after pulling it from the oven is a terrible cooking mistake. All the hot juices will instantly run out onto your cutting board, leaving the meat dry. Give your baked chicken breast at least eight minutes of quiet resting time under a foil sheet. This essential pause allows the hot moisture to redistribute beautifully throughout the entire piece of meat. Your patience will be rewarded with a remarkably tender bite that holds its flavor perfectly during dinner.
Think of the meat fibers as tiny sponges that expand and lose water during the baking process. When your baked chicken breast rests away from direct heat, those fibers relax and reabsorb the loose juices. Covering the pan loosely with aluminum foil traps the steam without making the outer skin completely soggy.
This resting period is just as important as the actual time spent inside the hot oven. Never rush this final countdown if you truly care about the quality of your evening meal.
How to Time Your Weeknight Meal Prep
Batch cooking four large pieces at once requires careful spacing on your metal baking sheet. Crowding the pan creates unwanted steam, which completely destroys the beautiful exterior crust you want. Always leave an inch of open space between each baked chicken breast for proper air circulation. Set a loud smartphone timer for exactly eighteen minutes to avoid forgetting your food in the oven. Let the cooked meat cool down completely before slicing it for your weekly storage containers.

Preventing Soggy Leftovers
Storing hot chicken creates condensation, which makes your carefully planned healthy lunches incredibly soggy within days. Divide your portions into airtight glass bowls to maintain the best possible texture throughout the long week. You can add a splash of chicken broth before reheating to restore any lost surface moisture.
The Ultimate Time-Saving Reward
This weekly preparation strategy saves hours of stressful cooking time during busy Monday to Friday workdays. Your organized meal plan will become much easier to follow when your protein is perfectly juicy.
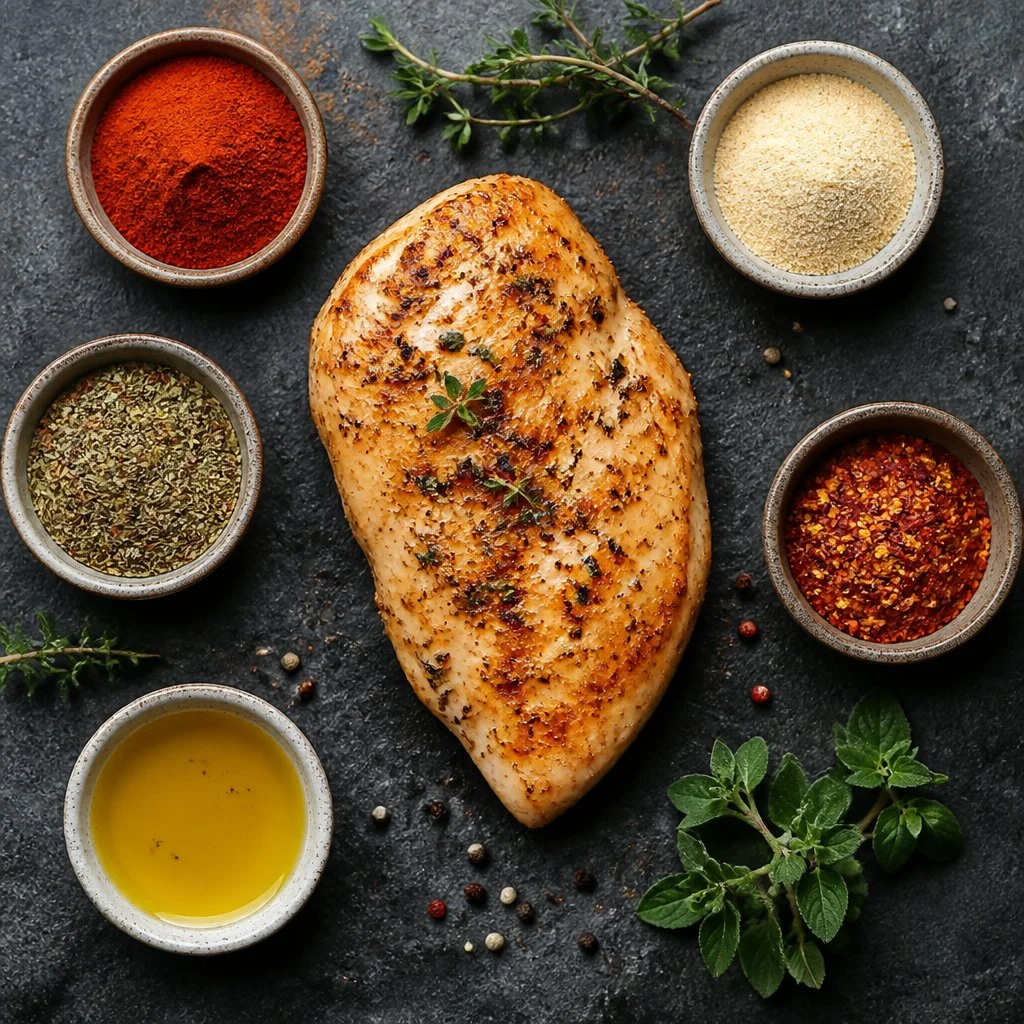
Maximizing Flavor with Custom Seasoning Blends
A proper spice mixture requires the right balance of salt, garlic powder, and smoked paprika. Avoid using thick sugary sauces too early because they burn quickly inside a high-heat oven environment. Coat your raw baked chicken breast evenly with dry herbs before placing it on the pan. The dry seasonings create an extra layer of protection against the harsh moving air of the oven. Experiment with different flavor profiles like Italian seasoning or spicy Mexican chili powder for variety.
The Power of Olive Oil
Changing your spice routine prevents your healthy diet from becoming boring and repetitive after a few weeks. Always apply a thin layer of olive oil to help the dry spices stick smoothly to your baked chicken breast. This simple step ensures that every single bite delivers a wonderful punch of savory flavor to your tongue. Cooking delicious food does not require expensive ingredients if you know how to use your pantry spice rack.
Common Pitfalls to Avoid with Poultry
Using uneven chicken pieces is another hidden mistake that leads to unevenly cooked family dinners tonight. A thin piece will cook much faster than a thick one, causing half the pan to dry out. Use a heavy rolling pin to pound the meat to an even thickness before seasoning it. This simple physical adjustment ensures that every baked chicken breast finishes cooking at the exact same moment. You will no longer have to worry about serving undercooked centers to your anxious family members.
Another major mistake is opening the oven door repeatedly to check on the progress of your food. Every time you open the door, the internal temperature drops by twenty-five degrees instantly. This temperature fluctuation stretches the cooking time and dries out the natural moisture of the white meat. Trust your kitchen timer and your digital thermometer instead of relying on constant visual inspection.
Conclusion
Mastering a juicy weeknight meal takes practice, but proper timing with your baked chicken breast eliminates all the frustrating cooking guesswork completely. Moving away from low temperatures and unmeasured baking windows will instantly upgrade your daily dinner standards. I hope you feel fully confident to stop serving dry, chalky meat to your loved ones now.
Grab a digital thermometer tonight and test these precise timing rules during your very next kitchen session. Your weekly prep routine will finally become something you actually look forward to eating every single day. Share your own cooking results with me after you try this simple four hundred degree baking method.
If you want more straightforward kitchen formulas for your next baked chicken breast, subscribe to my weekly newsletter below. Do not miss my upcoming guide on matching these juicy meats with the perfect quick vegetable sides.